Homemade Harbor Freight Trailer Camper | James Tang Photography
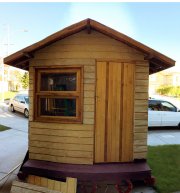
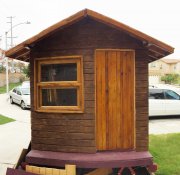
So I did a thing. I started a cabin on wheels project in the middle of this year. I’ve always been fascinated with tiny homes but at the moment it is not practical for me to own one. A homemade camper trailer is a good compromise especially with camping in bad weather and the ease of towing. However, I don’t want my camper to look like another travel camper. I want it to have the look and feel of a cabin, just smaller and mobile. So I designed a small cabin and put it on a trailer. It’s my own cabin on wheels.
The cabin on wheels is built on a Harbor Freight 1720 lbs trailer kit. I upgraded the wheels, hubs, tires, and bearings. I bolted the trailer frame together first, then welded all the joints. I also strengthen the tongue and added an anti-sway bar. I upgraded the original Harbor Freight hubs with Ultra Tow High Speed Hubs with 5 on 4.5 bolt pattern. It’s rated for 1250 lbs each hub. It’s a more common bolt pattern so it’s easier to find wheels and replacement parts compared to the Harbor Freight’s hubs and bolt pattern. The upgraded hubs fit right on the stock axle of the trailer. The tires are Kenda Karrier S-Trail ST145/R12 Radial Tire w/ 12″ Galvanized Spoke Wheel. All tires and wheels are rated for just over 1200lbs each. The cabin frame is built using 2×3 lumber, 1/4 plywood, Tyvek weather barrier, and T1-11 sidings. All the windows are custom made from scratch. At the moment, the roof is plywood painted with 30-year weather proof deck paint. Eventually, I will put on a tin roof, solar panels, run both AC and DC using a deep cycle battery bank. All the light fixtures will be on DC, and any thing we can’t run on DC will be AC. Right now my homemade cabin on wheels is functional and decent looking but far from where I want it to be. I haven’t actually weighed the trailer but my guesstimate is about 1200-1500lbs based on the average weight of lumber in the sizes that I use. The dimensions of the cabin are 10ft long by 6ft wide by 6.5ft tall. The height of the trailer from the ground to the top is 8 ft 8 in tall.
It took about 6 months to design and work out some of the issues, about 1 month to build it up to where it’s functional, and it is an on going project to make sure it looks good. Here are some photos from the homemade Harbor Freight camper, or my little cabin on wheels, build progress. I’m not an expert so please excuse me for using some of the wrong terminologies. I worked on the trailer whenever I get a chance, so I did not want to spend time on pretty photos so my iPhone 6 did most of the photography work. More will come soon as I continue to finish up all the details.
I bought the 1720lbs trailer kit from Habor Freight, did both bolt and weld build, “strengthened”the tongue, added an anti-sway bar, added a rolling jack, and replaced the hitch mount bolts with grade 8 bolt. I widened the frame to 6x10ft.
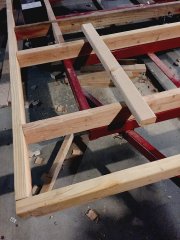
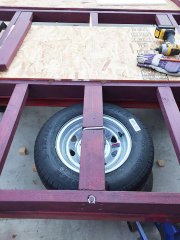
For the floor framing, I used 2×4 lumber in a combination of screws and joints, raised it above the fenders, bolted down to the frame with 15 5/8 steel bolts, made a spare tire mount under the trailer, and painted the wood using 30 years deck paint.
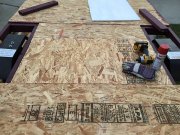
For the floor, I used 1/2″ OSB boards, built a floor storage, and painted the underside of the boards with weather proof rubber paint.
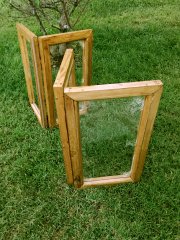
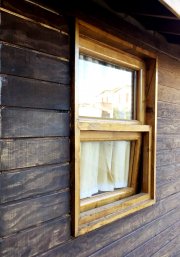
For the windows, I used 1/8″ acrylic plexiglass and built each window and frame. The trailer camper has a total of 3 large windows. They swing inward to accommodate screen door (important for summer camping with bugs). I miscalculated the windows size a bit so they’re HUGE!
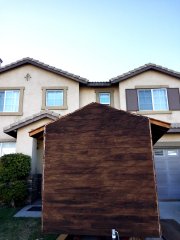
For the wall framing, I used 2×3 lumber to save weight. I space each stud about 12″ apart and used corner brackets to add strength and reduce flex. It’s a ridge board design to give the center maximum head space of about 6.5ft. The roof has about 1 foot of overhang on the sides and by the door. I intentionally did not build an over hang at the front of the trailer to reduce wind drag while towing.
For underlayment (I think that’s what you call it) I used thin 7/32in panels to save weight. Then I wrapped everything with Dupon Tyvek house wrap.
For sidings, I used T1-11 plywood boards.
I stained everything using Varathane Special Walnut color and sealed it using an oil-based sealant.
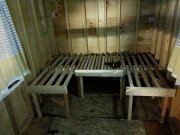
I’m particularly happy about this bed frame. It can be used as a bed, or a u-shape couch with a center table. There’s storage underneath that I can store and hide away the mess.
That is it for now. Next will be the trimming around the doors and windows, tin roof, solar panels, DC wiring inside, outlets, and switches. Stay tuned for part 2!
James Tang
Latest posts by James Tang (see all)
- A fairy tale intimate wedding in the forest at Skypark | Gabrielle and Jason - September 17, 2020
- A Yosemite National Park Engagement Session During COVID-19| James Tang Photography - August 4, 2020
- Winter Engagement Session at Sequoia National Park | James Tang Photography - March 10, 2020
- San Diego Sunset Cliffs Engagement Photography Session | Samantha and Jake - February 25, 2020
- A Beautiful Engagement Session At Lassen Volcanic National Park | James Tang Photography - May 6, 2019


 Previous Post


